The floating home we purchased was a planned renovation. We knew, no matter what we purchased, I’d most likely want to update it to what I like. I’m very sensitive to surroundings and like my home a certain way. I like to say, “If my surroundings are chaos, I’m chaos.”
I’d spent the years raising kids and promised myself that when Tim and I purchased our next home, I would have it set up the way that we were comfortable and in the style that I had always wanted. I’d put away the money from the home we sold in Colorado for just this investment and by God, I was going to have it. 🙂
The floating home is solid- the previous owner did all the right stuff, but admittedly, he was now a bachelor and he’d never been much for aesthetics. The current floor plan is an easy one to remodel. I was able to see it in my mind as soon as I walked in the front door and there have been only a few changes from what I foresaw in my mind, that first day I walked onto the premises. I thought I would share some screenshots of the 3-D plans I drew out so other’s can come along with the ride. This way, you also get to see how close we come to the plans with the final product when complete.
Overall Home Designs
All of the designs you see initially were done with the 3-D Home Design app on iPad, which was free and allowed me to send them to my contractor, as well to my phone and I could view them and show them to others with the free app. Send the plans, they import them in and anyone could view them in 2D or 3D, so it made it very convenient. The measurements are based off everything I took in the house, so although there was some “inching” while I moved walls, windows, etc. around while working with the design, the overall floor designs I did are incredibly accurate for someone who’s never done this before. CAD-like software has come a long way to the untrained user and I hope this gives others the inspiration to take this type of project on:
First Floor- Arial View:

There is the main living area with the large kitchen, the added island and living room. We really never found a use for a dining room, so this was something we simply didn’t put into the design and have stools at the kitchen island. We will also have a large table with chairs outside the sliding glass doors for summer guests when over.
The office/guest bedroom will have a barn door closure that is just left of the staircase and also has the second bathroom off of it. There’s a closet that once held the washer/dryer we’re moving upstairs.
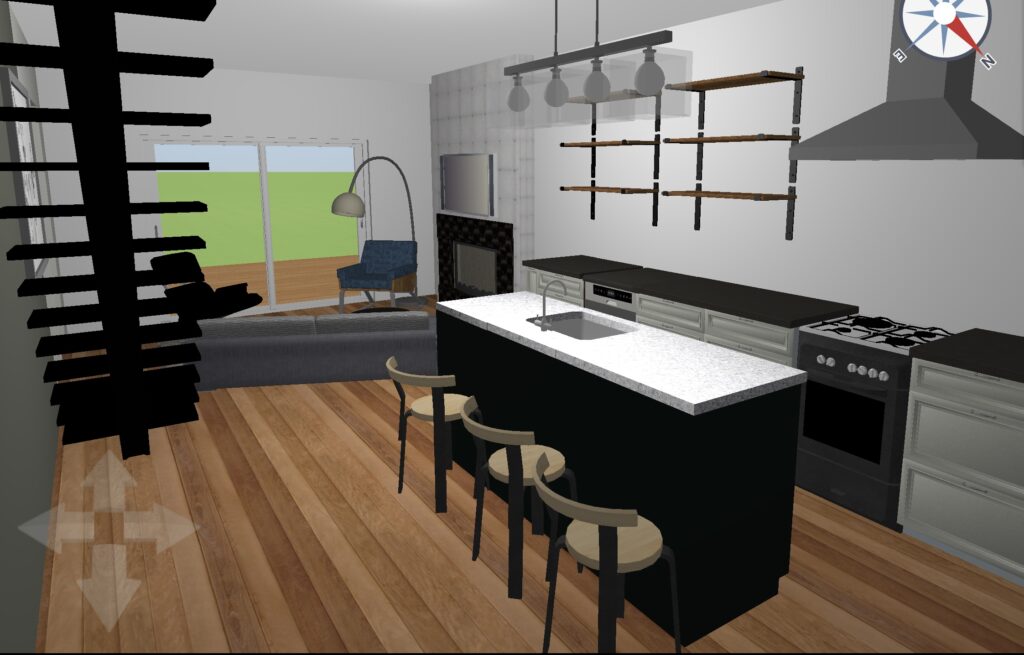
First Floor- Eye View:
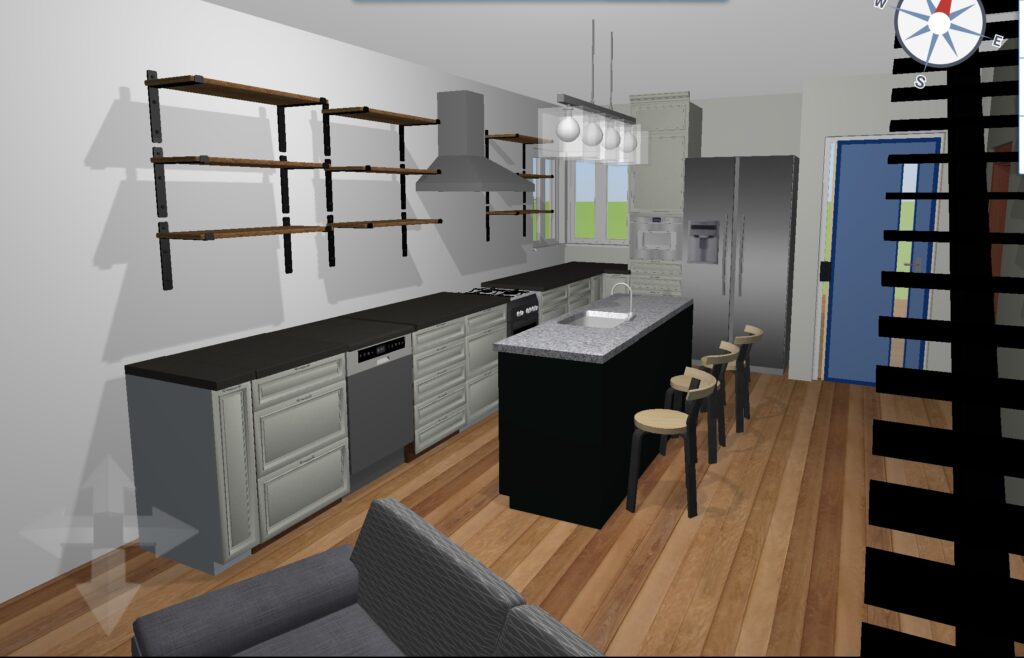
First Floor, Front Door to the Back Deck:
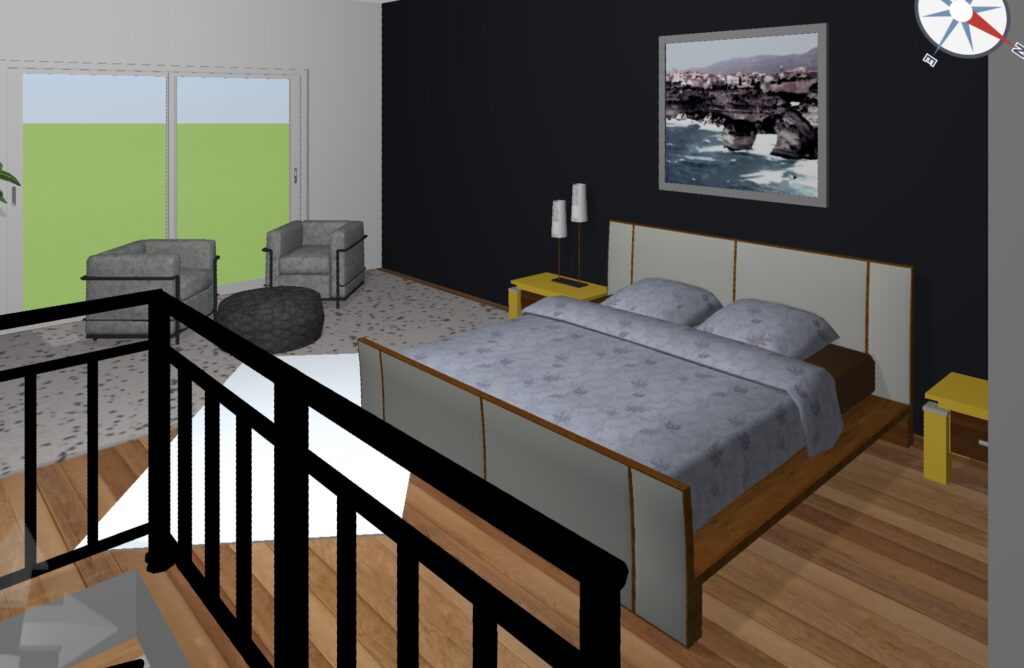
The upstairs has the same square footage and consists of the master suite- bedroom, master bath and a small office nook for me looking over the river. Our closet also has the new stackable washer/dryer in there, too.
Second Floor, Ariel View:

Second Floor, Eye-level View:
You’ll notice that the stairwell is still in the center of the house, but the direction has changed and it’s no longer a large, central area with a closet, as it was previously. We were able to reclaim about 35 more sq ft. per floor in floor space this way, too.
Kitchen Details
Your Kitchen is an important part of your house, so of course, I needed to do more detailed drawings for the cabinet maker to ensure we received what we’d hoped for. I used an app called EZ Kitchen on my iPad to draw everything out and it was pretty simple once you get the hang it.
Cabinet Walls:
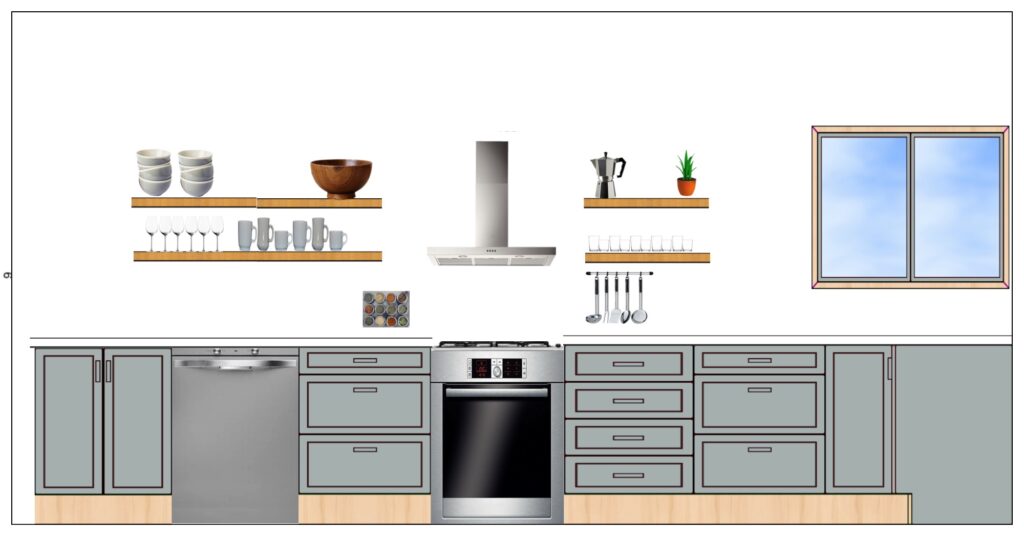
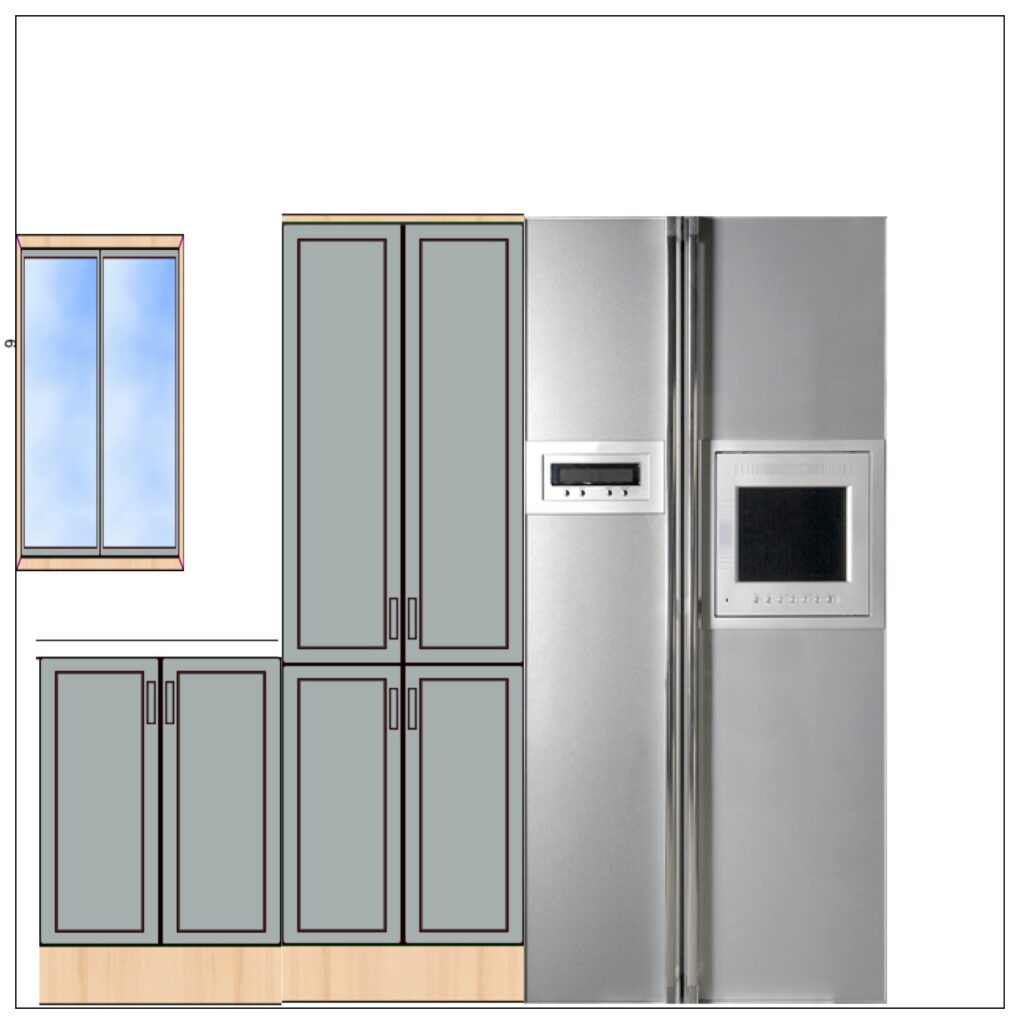
The only upper cabinet that I have is one that is part of the pantry cabinet next to the refrigerator. I want to have pull out shelves inside this cabinet that I can keep all my storage containers in that I am very keen on labeling vs. using the default packing that most dry goods comes in. There are a few reasons for this:
- You can store a lot more in a small amount of space
- It’s easier to find things, as you are able to label everything
- The storage containers store better, keeping from a mess of bags, etc.
- Dry goods last longer as the containers I use are air-tight
- Air-tight containers are also safer from ants and other pests
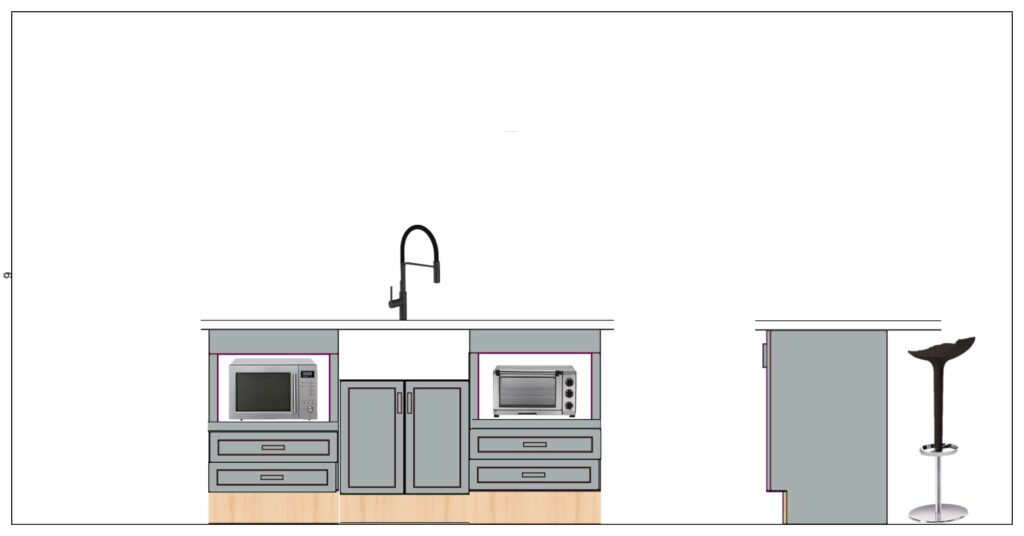
Kitchen Island
The kitchen island was important, too. I hate to have a ton of junk on my kitchen counters. I’m forever cleaning stuff off my kitchen counters, so small appliances can really become a pain for me. I wanted to ensure that I had spaces with power in my island for both the microwave and toaster oven. Here’s the quick mock up of the kitchen island: